In this example we are using our Restaurant Template but the same rules would apply to any of our templates. When you download our templates for Joomla! 3.9 the download includes Joomla! core, the Template and sample data. So, it is not necessary to install Joomla!.
Okay, let's get started!
In this tutorial you will find detailed information on how to install quickstart on your hosting account (we have used cPanel as an example) and how to install quickstart on a local host using XAMPP. The installation process is easy and requires just a few clicks. You won’t need any coding or design skills to install a fully-functional Akeeba kickstart installation within minutes.
• Step 1: Download quickstart package (example: restaurant template)

Login to the Customer Area, go to the Download section and download the full package and unzip it. You will see the Quickstart package zip. Unzip the Quickstart package and you will see the backup file(s) and Akeeba Kickstart included. Later we'll need to run file kickstart.php.

• Step 2. Install quickstart package
Option 1. How to install quickstart on your hosting account.
#1: Upload Quickstart File via File Manager
You can install the Quickstart package on your hosting by following these steps:
-
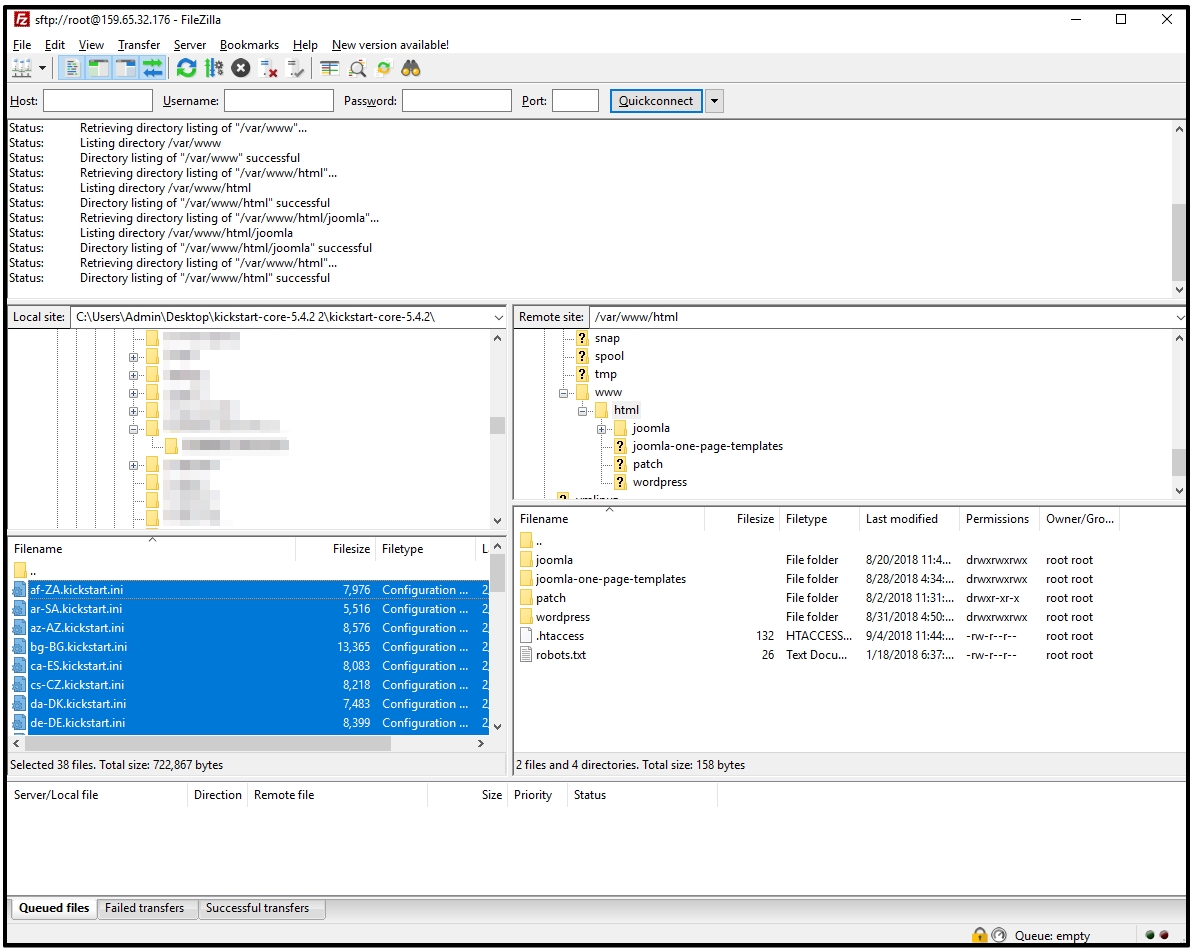
To install the Quickstart package on a web server, you need to upload the the package/extracted files to the server. In order to transfer files to the web server from your computer, you can use an FTP client for example: Filezilla. (In this example, we are showing cPanel. Your hosting control panel will look different). Navigate to your website folder (normally it’s the “public_html” folder). Then browse your local drive (on the left) and upload the files to an appropriate folder in the Remote Site (on the right), e.g. /var/www/html
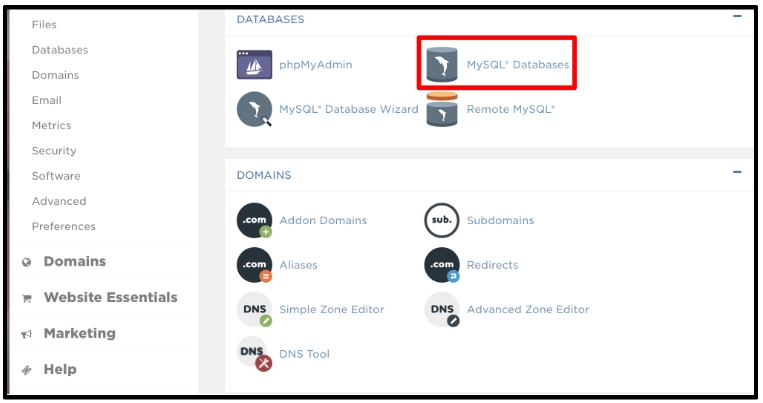
#2: Create a New database
Create a new MySQL database for your website. If you don’t know how to create a database, contact your hosting support. (In this example, we are showing cPanel.Your hosting control panel will look different)
• Step 3: Run the Installation
Finally, in your browser go to http://yourdomain.com/kickstart.php and follow the on-screen instructions.
Option 2: How to install quickstart on localhost using XAMPP
Installing the quickstart package on local host is straightforward but can be tricky the first time you attempt it. So for this step we’ve provided instructions on how to do it right from scratch.
In order to run the quickstart package, you need not only a web server, but also 2 more things: a PHP script interpreter and MySQL database system. It sounds complicated but thankfully, there is a single package called XAMPP with all the elements included.
Let’s install XAMPP on your computer.
#1: Installing XAMPP
XAMPP is a free distribution package that makes it easy to install Apache Web Server, PHP, PEAR, and MySQL. Before installing XAMPP, you should turn off any other web servers and instances of MySQL you have running.
Download: https://www.apachefriends.org/download.html
- Download and Install XAMPP Locally on PC/Windows/Mac
- Run the installation file as you do with regular software and follow the step-by-step instructions.
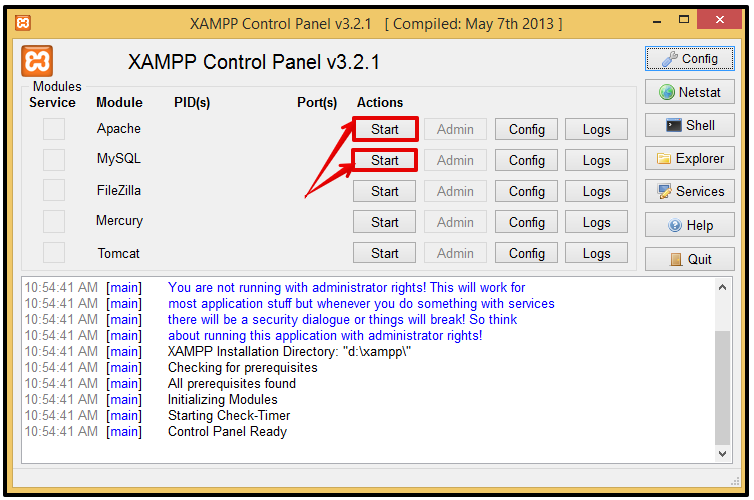
- Open “XAMPP Control Panel Application” and start “Apache” and “MySQL”.
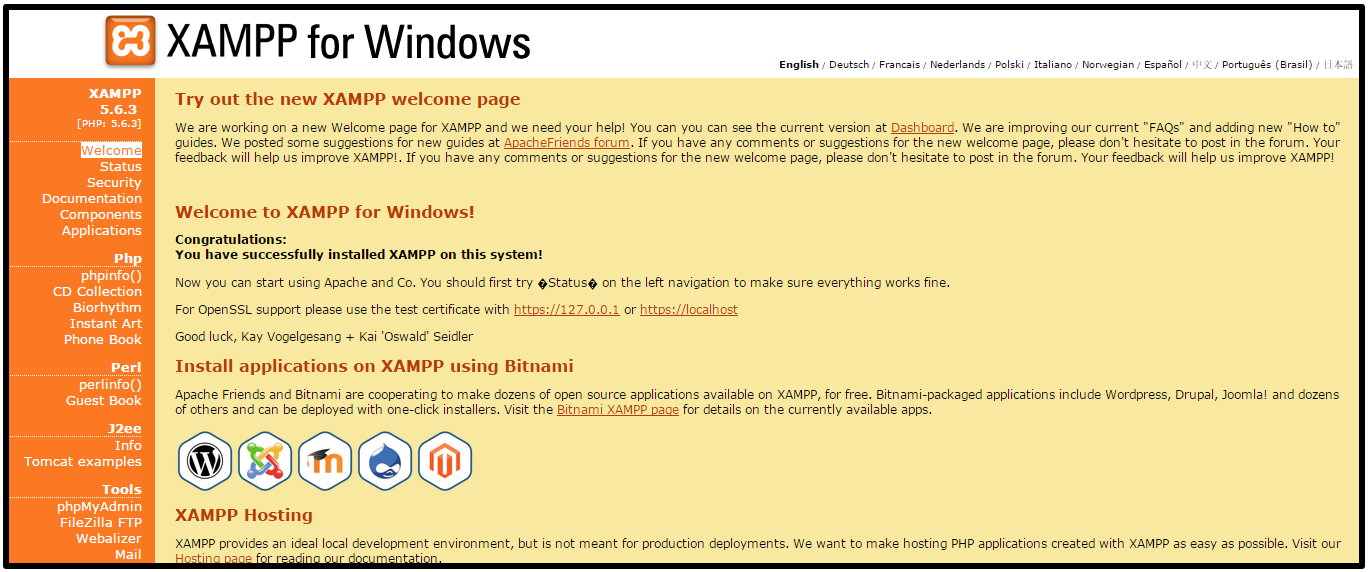
That’s it! Your localhost is now installed. You can check if it works or not by typing the address: “http://localhost” in your web browser. You should see a page (in this example, XAMPP for Windows) as illustrated below.
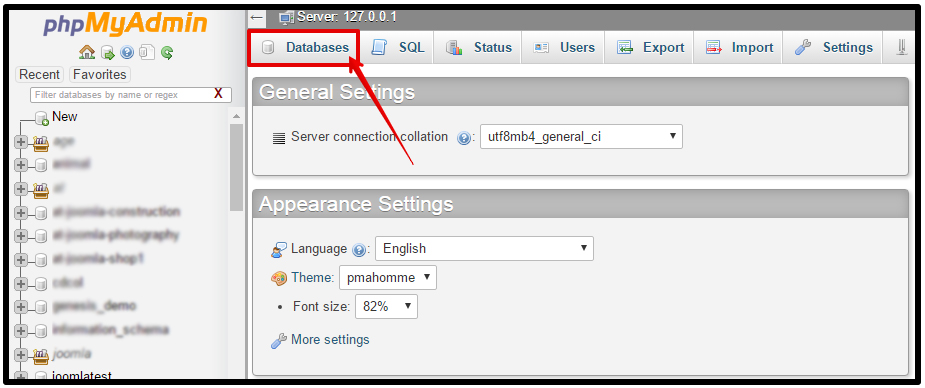
#2: Create a database in phpMyAdmin.
From the XAMPP interface, click phpMyAdmin to start creating a database.

Next, click Database in the toolbar as illustrated below.
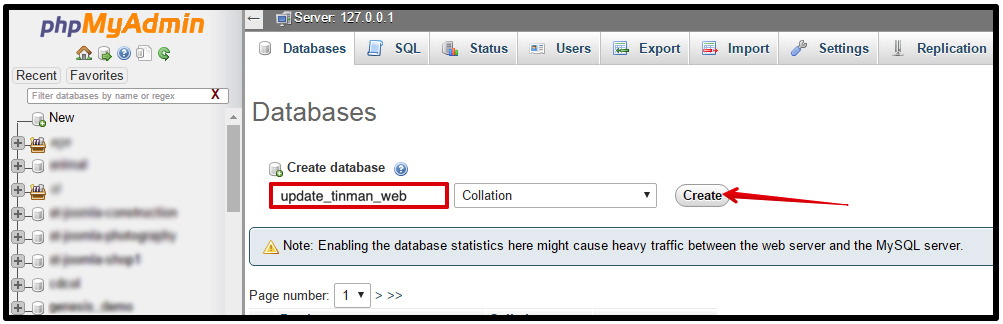
Enter the database name and then click Create
Now you are ready to install quickstart package.
#3: Create a new folder in the folder “htdocs” in the XAMPP folder.
– Create a new folder entitled “test-quickstart” in folder “Test” in folder “htdocs” in XAMPP folder. Normally it will be located at “C:\xampp\htdocs”.
– Unpack the downloaded package file into the folder “test-quickstart”.
– Go to the URL "http://localhost/Test/test-quickstart"
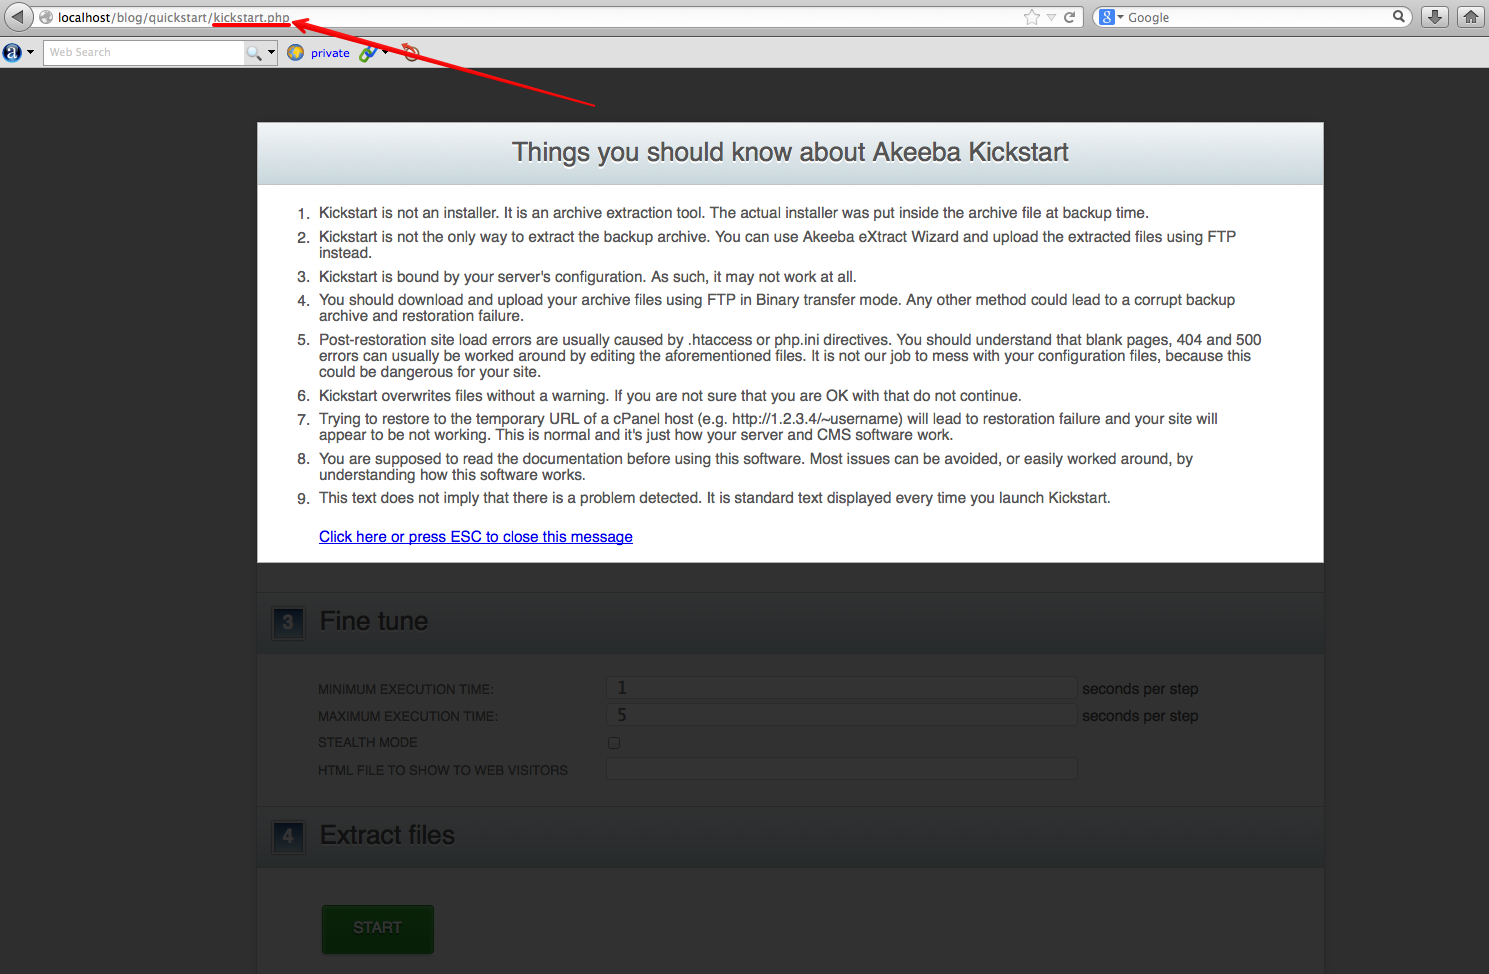
#4: Unzip the file
After you've downloaded the Quickstart package, unzip the files and you will see the backup and Akeeba Kickstart included in the list. We need to run the file kickstart.php.

* If you do not see exactly the same file listing, don’t worry , just run the file ‘kickstart.php’ by going to http://yourdomain.com/kickstart.php
#5: Agree with the Akeeba Kickstart policy
Select the file extension .jpa (this is the akeeba backup file and click ‘Start‘ to extract the files

Note: Select an extraction method. In most cases select 'Write to files: Directly‘. (You make a selection via the drop-down).
Select the extraction method ‘Hybrid (use FTP only if needed‘.
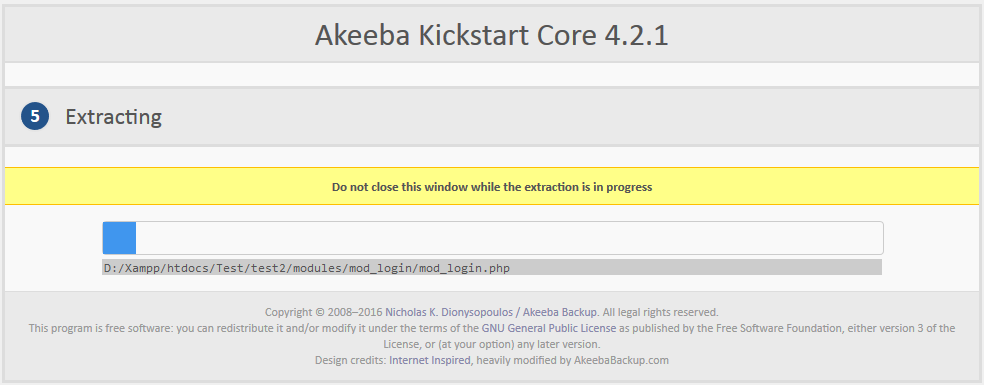
#6: Extract
In this step, we will see the screenshot similar to the one below. The "Select a backup archive" will be selected by default. The file is a backup file and we need to restore it. All the default settings and parameters should be kept and do not need to be changed .
Next, click the button ‘Start’ to start the backup file extraction process.
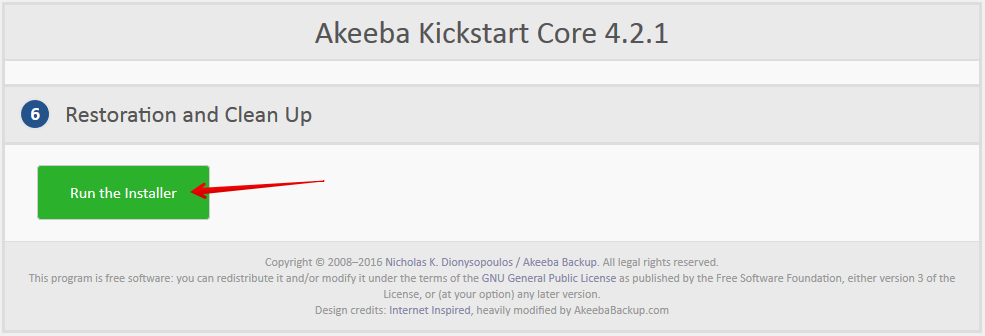
#7: Once the extraction proceess has completed, click 'Run the Installer '.
#8: System Pre-installation check
Now we move to the installation screen. This step is to pre-check the hosting configuration before the installation process is initiated. There are various parameters and recommended settings shown, which you can take note of (or a screenshot).
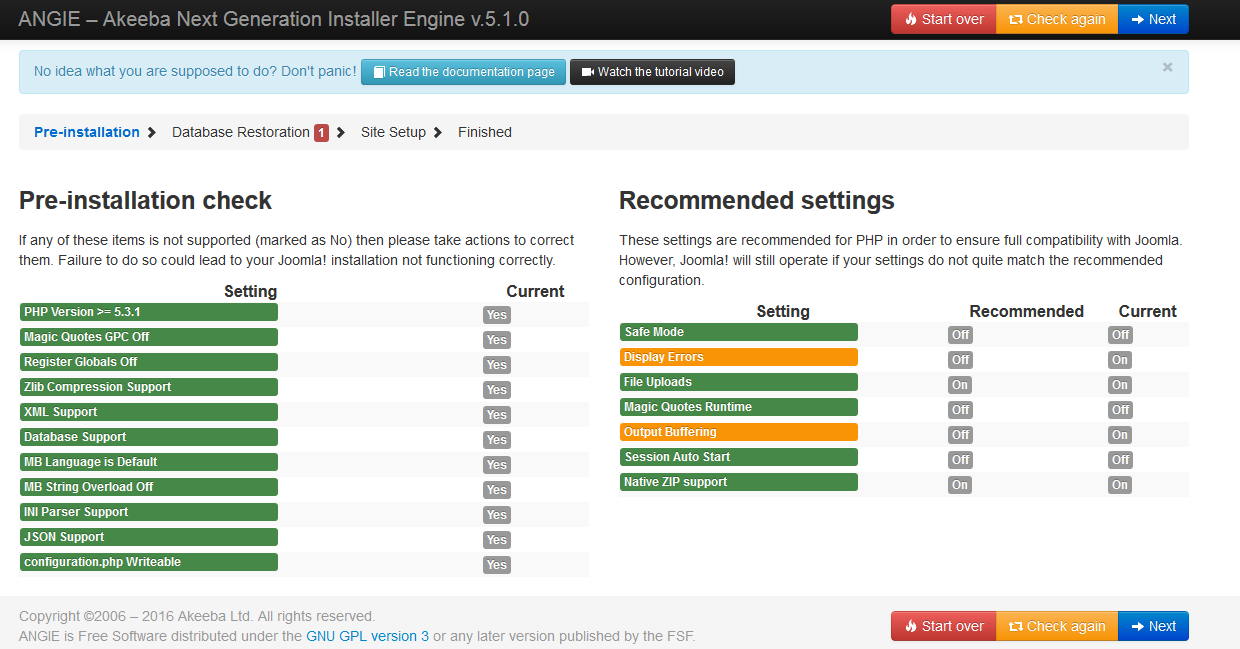
Click → Next
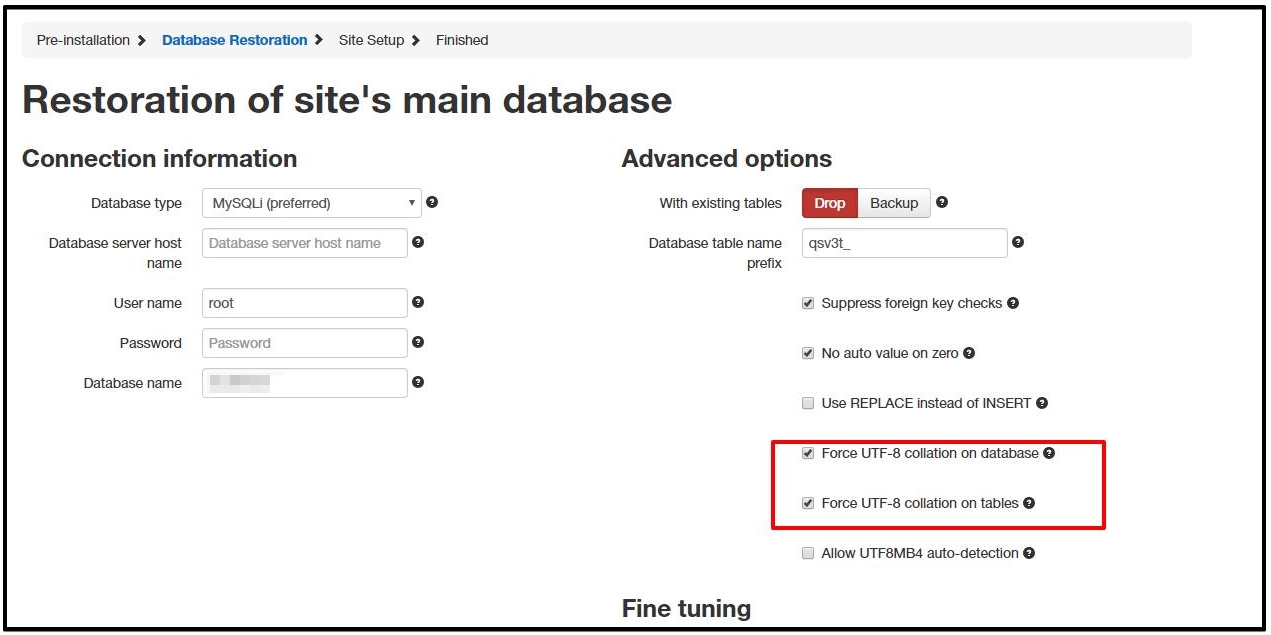
#9: Enter the information
Enter the information related to MySQL: Database type, username, database name and password. (You should have created a MySQL database in an earlier step)
Note: Uncheck "Allow UTF8MB4 auto-detection". Check “Force UTF-8 collation on database” and “Force UTF-8 collation on tables” as indicated in the image below.
Once everything is okay,click the button ‘Next’.
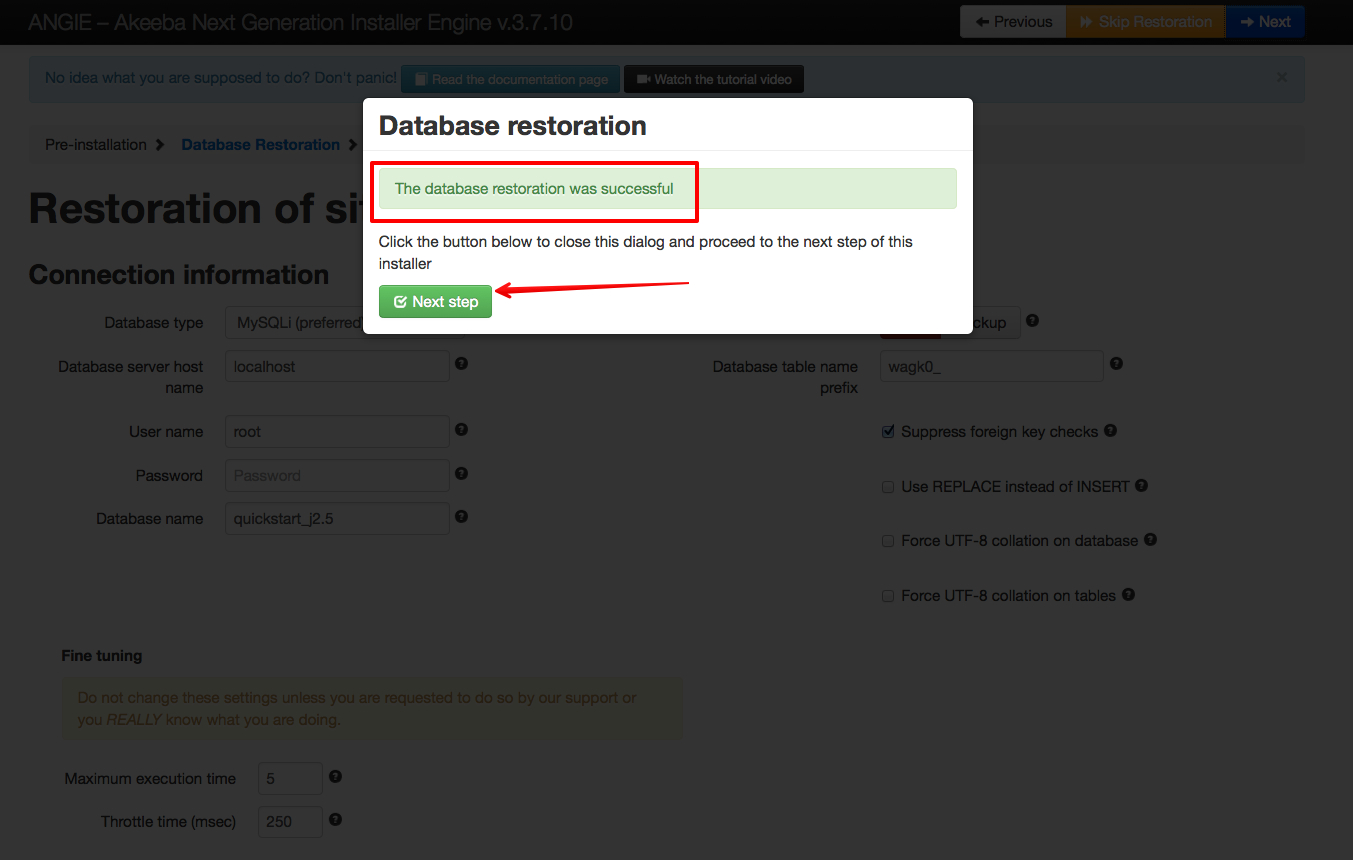
#10: Restore the database
Now you will see an alert box 'Database restoration' showing details of the database restoration. If you entered the correct database information, it will say, "The database restoration was successful." (As the image below)
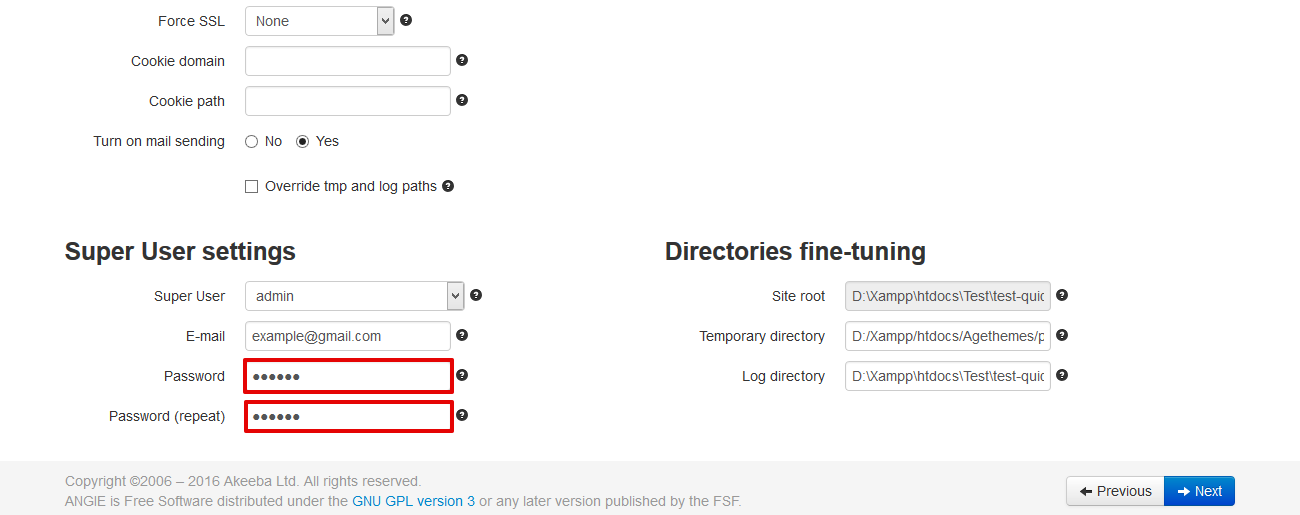
#11: Site info
This step requires you enter Site Information, Super User settings and FTP Layer Option (this option should be keep as default, we can change it later if necessary). In this step, you need to define a new username and password for the administrator account. These will both be used when you login as the administrator in the Joomla Dashboard.
(The default administrator account username is admin and the password is abc123)
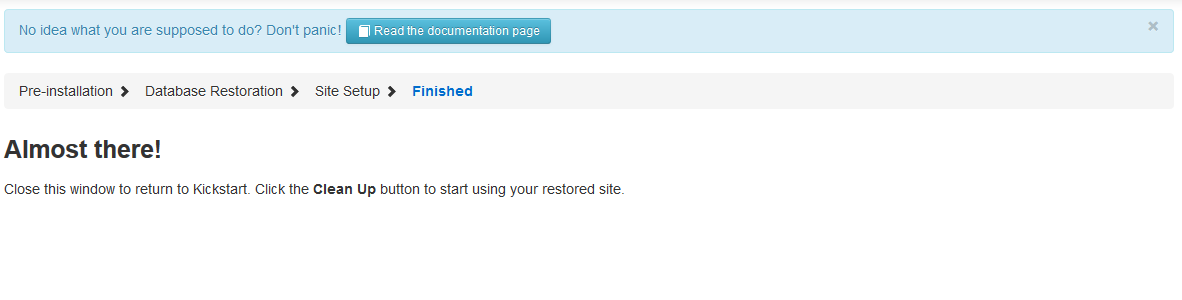
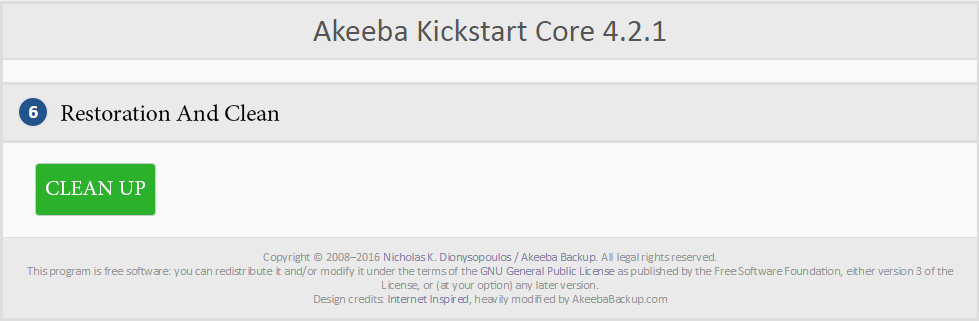
#12: The last step (to remove the installation folder)
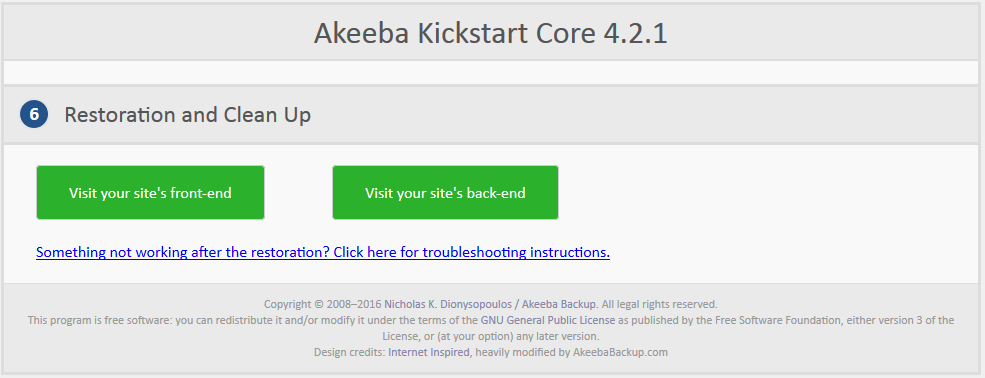
#13: Congratulations! You're now ready to start using your site.
To take a look at your new website, click the button ‘View your site’s front-end’.
To visit the Joomla Dashboard (where you will be editing your site), click the button ‘Visit your site’s back-end’.
Step 14: We're done!
Your default Joomla Login
1. Default login: http://yourwebsite/administrator
username: admin
password: The password you created at #11 (If you left it blank, the default password is abc123 )
2. If you changed Super User Settings during the install Quickstart package #9, you must to use that login info. If you've forgotten it, take a look at this link: how to restore your Joomla! password.
Akeeba Kickstart 5 x User's Guide
For more information, here is the Akeeba documenation in PDF format:
https://www.akeebabackup.com/download/akeeba-kickstart/6-0-0/kickstart-user-guide-pdf-zip.zip
Related Articles
CMS
PLANS & PRICING
FEATURED SITES
NEWSLETTER
Don't miss a beat. Receive special offers and updates by subscribing to our Newsletter.
All material on tinmanweb.com is protected by copyright law and by international treaties. © 2026 Tinman Studios. Intellectual and other property rights to the information contained in this site are held by Tinman Studios. All brands and product names are trademarks or registered trademarks of their respective companies. Tinman Studios disclaims any and all rights in these marks.
Wordpress is owned and operated by Automattic,Inc
TinmanWeb.com is not affiliated with or endorsed by Automattic,Inc.
Joomla! ® name is used under a limited license from Open Source Matters in the United States and other countries.
TinmanWeb.com is not affiliated with or endorsed by Open Source Matters or the Joomla! Project.